4. Creating your first scientific poster with PosterGenius
Topic: Learn how to create your first scientific poster with PosterGenius™.
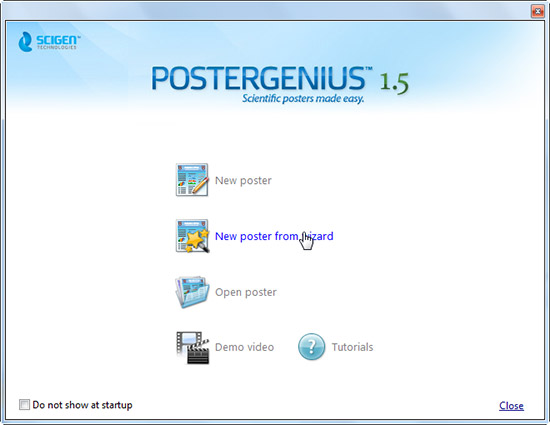
Soon after you launch PosterGenius™ you will see the Welcome screen.

Welcome screen
Click on "New poster from Wizard". A poster creation guide is launched, which will guide you to create your scientific poster through a few simple steps.
Step 1 of 4
In the first step, define the dimensions of your scientific poster according to the conference guidelines. If the conference you plan to send your scientific poster to is included in the list of conferences supported by PosterGenius™, you can simply select it. The dimensions of your poster are adjusted automatically by PosterGenius™ to conform to the specifications of the selected conference. As a result, you will not need to read the conference guidelines.
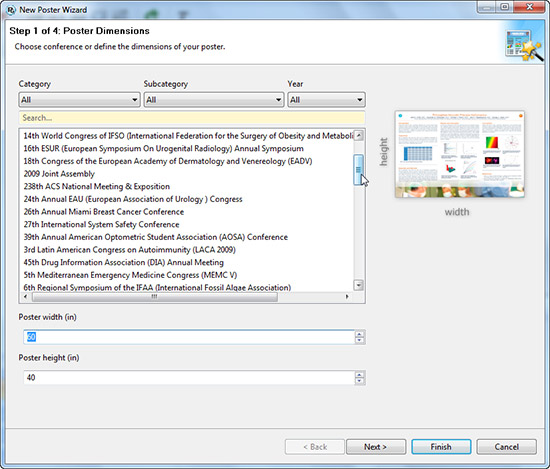
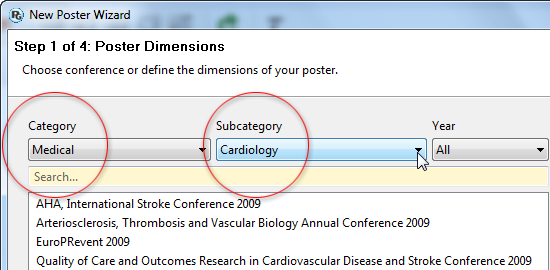
You may also filter the list by professional or research field and year, in order to see only conferences that you are interested in.
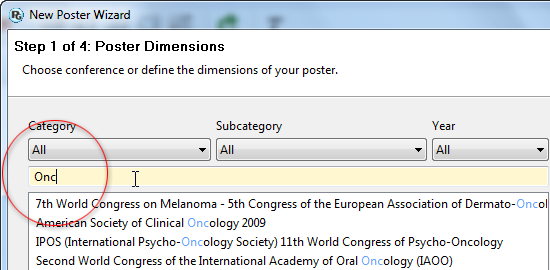
Furthermore, you may search in the "Search..." field for the name or part of the name of the conference you are interested in. As you type, PosterGenius™ automatically searches its database and shows relevant results.
Lastly, if the conference to which you are submitting your scientific poster is not included in the library, you may manually define the poster dimensions. To do so, simply type the dimensions to the corresponding fields (width and height). While you type in the dimensions of your poster, notice how the thumbnail on the right changes accordingly. As soon as you are finished, press "Next".
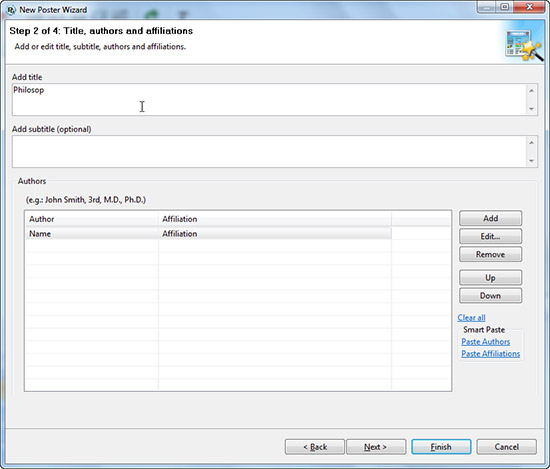
Step 2 of 4
In the second step of the Wizard you can define the title, subtitle (optional), the authors and author affiliations for your scientific poster. To do so, you may either type-in each piece of information into the corresponding fields, or bring it in from another document by simple Copy » Paste.
In addition to this, instead of typing the authors and affiliations, you can use the "SmartPaste" feature. To learn how to do so, check the corresponding tutorial: Automatic insertion of authors and institutions using "SmartPaste" of the "Authors and Affiliations" section. As soon as you are done, press "Next".
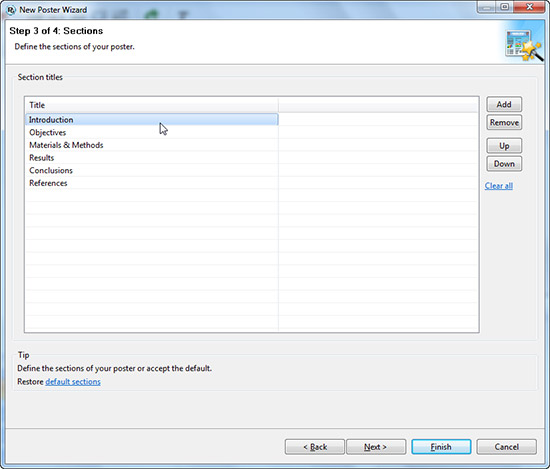
Step 3 of 4
In the third step you are asked to define the sections of your scientific poster. If the conference you chose in the 1st step of the wizard has a predefined section structure in its guidelines, PosterGenius™ will auto-fill these section titles automatically. If there are not predefined section titles in the conference guidelines, PosterGenius™ recommends a section list which is common in scientific works. You can add additional section titles or remove some of the existing using the corresponding buttons in the right part of the window. When you have finished click "Next".
Step 4 of 4
In the last step of the Wizard you will see the PosterGenius™ Library of Templates. Every template in PosterGenius™ has been designed to offer a complete typographically esthetical and chromatically harmonious result for the look and feel of your scientific poster. The templates are grouped in categories and subcategories by their subject. By moving your mouse over any of the thumbnails, you will see a larger preview image of the corresponding template. Furthermore, you may choose a template you like at this point, or change it later at any time while using PosterGenius™.
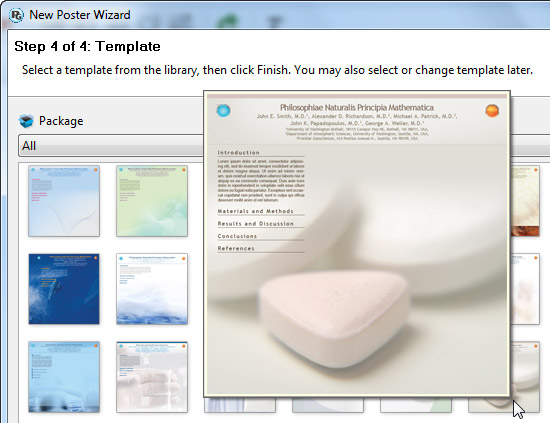
After you have chosen a template, click "Finish". The wizard will close and PosterGenius™ will create your scientific poster, containing the information you have already provided, including the title (and subtitle in case you have one), the authors and their affiliations as well as the section titles.
After the Wizard
You may now add the remaining content of your scientific poster, including text and images corresponding to the appropriate sections.
Adding Text.
By choosing a section from the section structure tree, to the left of your workspace, you can type your text directly or insert it by Copy » Paste from any document. Anytime you want to see the changes implemented in the poster click "Refresh".
Adding images.
You can add your images either directly from the application where you created them (by Copy » Paste) or from your hard drive where they are saved. For further details see the related "Inserting images and graphs into your scientific poster" tutorial.
Reformatting your scientific poster.
After you have added your content, you can reformat the poster using any of the available templates.
Optimally adjusting the content to the dimensions of your scientific poster.
When you have completed formatting your scientific poster, you can adjust your content to its dimensions, by using the poster optimizer.
Related tutorials
- Automatic insertion of authors and institutions in your scientific poster, using "SmartPaste"
- Preparing authors and institutions for automatic insertion to PosterGenius™
- Inserting images and graphs into your scientific poster
- Adding captions to your images and galleries
- Fitting the content to the available poster surface
- Adjusting the font size
Note: To view the tutorials you will need Adobe Reader or any other application that can open PDF files.
Adobe Reader is available for free download from Adobe Systems, Inc.: www.adobe.com


Beginning January 1, 2019, support for PosterGenius has ended.
No further maintenance updates, technical support, or product downloads will be available. Tutorials and FAQs will continue to be available on our website


Connect with us
Stay updated on offers, new stuff,
poster presentation tips and events.


